On Friday, the basement was poured and bricks were delivered (to start on Monday), and more ducts were run. Unfortunately, we didn't make it out on Thursday to see the rebar mesh for the basement floor.

Preethi inspects a brick (half thickness);
 The pile of sand, presumably for mixing with cement, lime and what not for the mortar.

The initial pile of bricks. They're covered with plastic in anticipation of rain this weekend. (Bricks are supposed to be a little wet, but not soaked for construction)

A pile of bricks.
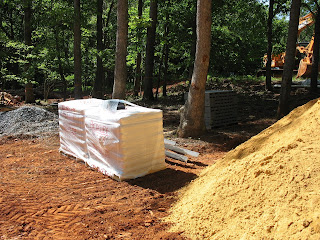
Cement blocks for the below grade portions.

As seen from the main level, the basement floor was poured. They had just finished smoothing (screeding I assume) when we arrived.

Looking at the basement floor from the basement door (southwest corner) back towards where the stairwell will be.

Looking across the den in the basement and the smooth floor. There's both rebar below and a vapor barrier (seen in earlier pictures)

Duct work leading from the stairwell back to where the top zone air handler will be (over the bedroom whose ceiling is not open to the roof)

Some of the ducts running in the attic.

Looking from the master bath into an adjacent (non-master) bedroom, you can see the freshly added ducts.

Close up on a duct leading into a vent.

The front door was delivered, though it won't go up for a while (don't want it damaged during the construction). It's 5' wide and 8' tall and made our of mahogony. Oddly, this was FAR cheaper than the equivalent 6'8" door made out of fir. Turns out the higher-end door is kept in stock while what should be the lower end door has to be custom made.

A little casing was built around the cold air return in the pantry.

Some additional water pipes were run. These are in the garage and connect to some earlier rough-ins in the master bath (above the ceiling on the right side of the picture).

Two 20A wires through the floor of the kitchen for outlets on the island.
 View of the front of the house. You can see where the front door has been installed. It's 8' Mahogany with 3/4 view, an arched top and needs to be stained.
 A closer view of the front door. You can see some of the bricks on the bottom right. We'll have small capstones over the windows in the front, but they haven't been delivered yet, so the brickmasons got started mostly on the back of the house.
 A close-up of the front door. We like it a lot, so there's perhaps too many pictures.
 Front door from just beyond the foyer.
 Front door from the the middle of the great room.
 Bricks on the lower front of hte house and some of the scaffolding on the west side.
 Closer view of the bricks on the front. The concrete blocks will be below grade.
  The west side of the house bricked up to the top of the main level.
 The brick fork lift (I'm sure it has a different name, but that's what it is) lifting up a pallet of bricks to the workers on the backside of the house.
 View of the bricking process from the rear of the house. The main level is complete and they're working on finishing off the bricks on the master bed / bath beyond the bumpout. If you count closely, you can see 7 workers in the photo, which explains how they managed to get so much done so quickly.
 Bricking around an exterior outlet box.
 Another outlet box (under the window) and a light box. The plastic is on the windows to reduce the chances of scratching the windows.
 A close up of the bricks. The type of brick we used is called Dan River Hand Craft (it's actually engineered with very straight lines) and the mortar pattern is called grapevine.
 Sand for making mortar and the mortar mixer.
 View of the bricks on the garage side of the hosue. In the earlier shot of the back, the bricks were about 5 feet down from the roof. 20 minutes later, they're nearly up to the roof.
 Tiles we were considering for the kitchen and foyer (Marrazzi Stone Collection). The whiteish tile was a given, but the choice was between the greenish-grey tile on the right and the straight-grey on the left. We're going with the greenish-grey.
 We're considering these tiles (Marazzi Jade Sage - slightly green). Here we were checking out if we could set up the tiles on a diagonal and have them line up right with the shower and the "throne room" (they did).
 A roughed-in step in the garage was added during the week. Originally, we thought we were going to need two steps, but we were able to make the inspector happy with just one (less space taken up in the garage).
 A wall for shelves in the main-level bath.
 The framed-in fireplace.
 I was curious to see what heating / cooling work had been done in the attic, so I climbed up. This also let me see things like the top of a shelf in an upper bedroom.
 Another shelf in one of the upper bedrooms.
 The shelf in the master bedroom.
 The attic fan with the dual pole single throw switch (turns on with attic thermostat and when whole house fan is on).
 The air handling equipment I originally came up into the attic to see.
 This was the inspection sticker on the front door. It's really just posted here for my personal amusement as that's the name of one of my nephews.


